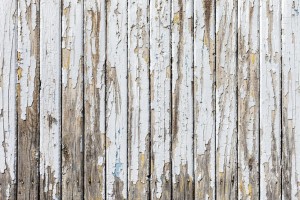
Take a peek outside. How does your wood fence look? Could it use some sprucing up? Do you even have a wood fence? Have you hesitated at the idea of a wood fence because the raw wood look is unappealing to you? Luckily, Hercules Fence of Northern Virginia can solve any and all wood fence issues and concerns you might have. Whether you have an existing fence that could use a revival, or you’re considering having one installed, this how-to guide will give you tips on painting or staining a wood fence.
Step 1: Rally the Materials
The first step to any DIY home improvement project is to acquire everything you’ll need to complete it. In this case, you want to gather:
- High quality paint/stain and primer formulated for outdoor use. Look for things like UV blockers and weather resistance.
- A good paintbrush. Despite common belief, not all paintbrushes are created equal. Cheaping out on a paintbrush will earn you lost bristles and rough edges, which are liable to reduce the efficiency of your painting or staining project.
- Various other painting supplies such as a tray, coveralls, and perhaps some good tunes to keep you company while you work.
Step 2: Prepare the Fence for Battle
Once you have everything you need, it’s time to make sure the fence is ready to receive its new coat of paint.
- Clear debris, whether in the form of cobwebs, leaves, dirt and grime, what have you. Whatever it is that may be impeding your paint job, brush it off, wipe it off, scrub it off, just get it off. You shouldn’t need anything more than a broom and/or a washcloth and a bucket of warm water.
- Check for moisture or insect damage, and if you have an existing paint job that you’re renovating, chip off any loose or flaking parts.
- Sand it down to a smooth surface that will be receptive to paint and primer, and then it’s go time.
Step 3: Prime Time
Primer protects wood and gives paint and stain a better surface to hold on to. Apply it in small sections, working deliberately to ensure even coverage. Make sure your primer coat is totally dry before proceeding.
Step 4: Attack!
Alright, technically it’s more of a controlled maneuver than an all-out attack. We get a little excited about would fences. Anyway.
- Slow and steady. Using the same tact as primer, you want to take your painting and staining deliberately with even coverage. General rule of thumb says to take it about five boards at a time. That way, you can take care of both sides of the fence without worrying about dry lines or clumps on one side as you move across large portions of the other.
- Start at the top of each board that you paint, so that potential drips can be smoothed over as you work your way down, rather than having those drips mess up parts that you’ve already worked on.
Voilá! With a little elbow grease (or some Tom Sawyer trickery), you have yourself a lovely new painted or stained fence. If you have any questions about our guide, don’t hesitate to contact us for assistance.
Want to talk to the Northern VA fencing experts?
Call Hercules Fence of Northern Virginia for your fencing needs. We have decades of experience in the fencing industry, and can offer you the best in ornamental steel, chain link, wooden fences and more. Our dedicated teams of fencing professionals are highly trained, skilled, and experienced in providing quality fence installations of any type. We’ll work with you to find a fence that bests suits your needs and budget.
Contact Hercules Fence of Northern Virginia at (703) 551-2609, drop in, or contact us on our website to learn more about spring fence construction!
You can keep up to date with offers and information from Hercules Fence of Virginia Beach on Facebook, Google+, Pinterest,LinkedIn, and Twitter.


